When designing a truly outstanding exhibition stand, the most important component is undoubted the graphics that dress the space. They should emanate the life and soul of your brand, and they provide a perfect opportunity to show off your recent photoshoot or brand campaign in large format print. Our experienced design team know the artworking process inside and out, so here’s our 5 best Adobe Illustrator practices for exhibition graphics ✏
Graphic Materials
There are lots of different materials that we use for large scale printing and our team always know the right spec for the task at hand.
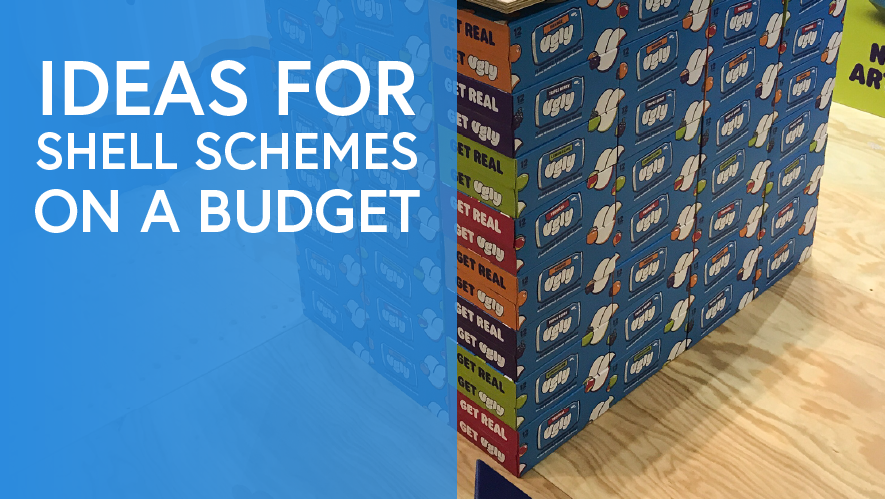
In a Shell Scheme, you’ll likely be using rollable vinyl panels with clips. In a Space Only stand, you’ll be using stretch tension fabrics or foamex panel graphics, or both.
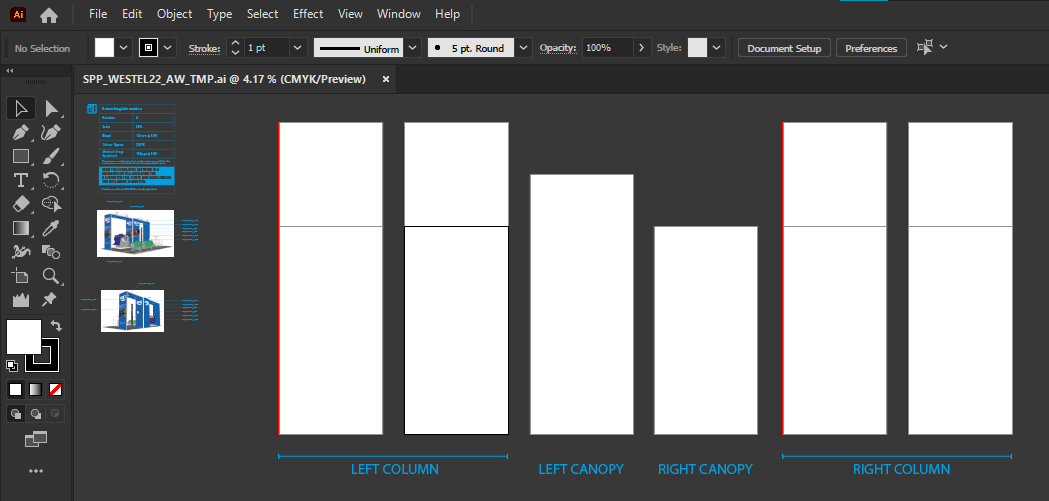
We’ll provide you with artwork templates to make your life easier!
To simplify your design process, our team will provide you with Illustrator artwork templates which are created to the exact dimensions and material specifications for your stand. The templates are set up with the correct “bleed”, which is the amount of extra artwork required to avoid white lines on the edges of your print, and are provided in CMYK colour space. It’s worth noting that different materials have different amounts of bleed so make sure that you’re using the templates we send you to ensure top-notch print every time. Typically, panels require 3mm bleed and fabrics need a whopping 50mm.

If your templates have joins (usually in Shell Scheme vinyl), try to avoid text on the join lines.
Graphic line up is usually very good but due to a variety of factors including fabric stretch and printing tolerances, we recommend avoiding text or line artwork over any join lines if possible. By thinking about the details, your artworking will look so much nicer as a result.
Image Resolution
Many designers are now expected to have multi-disciplinary skillsets, often creating for web and print formats. However, designs that look great on web often require some tweaking for print, and the one thing that crops up the most is low image resolution.
When creating artwork for print, our minimum image resolution for large format printing is 75PPI at 100% document scale. This might sound complicated, but thankfully Illustrator has an easy tool for checking image PPI.
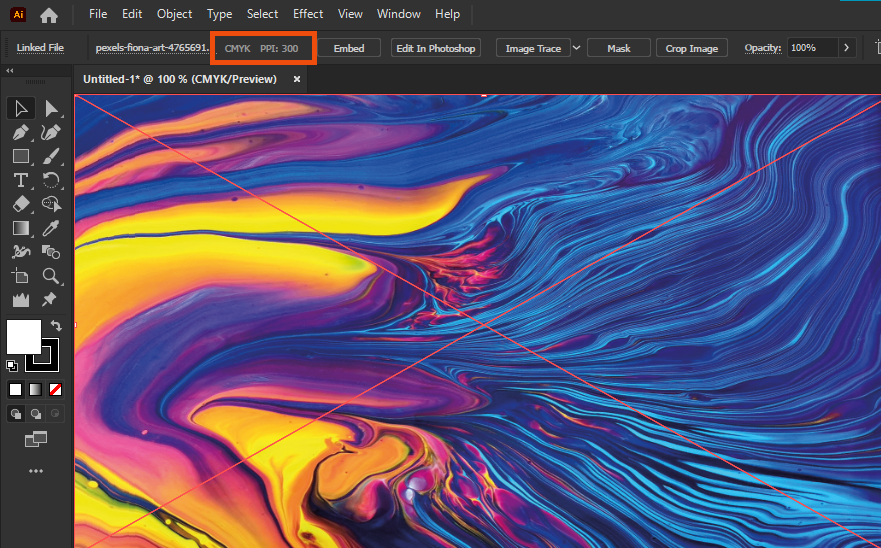
You can check the PPI and colour space of the inserted image.
If your PPI is less than 75PPI, you risk low quality and pixelated print. If you have the image in higher resolution, we highly recommend using it as it’s the best way to improve your print. If you don’t have any higher resolution imagery then we suggest upscaling the image in Photoshop. By using the “Remove JPEG Artifacts” Neural Filter before the upscale, you may receive better results than you’d expect. Remember that in most cases, people will be viewing your graphics from over a metre or more away. Although crisp graphics are what we aim for, a little blurriness is much better than pixelated prints.
Another key point is to provide any logos in vector format rather than rasterised. Vector, i.e. the original linework, provides super-crisp print when printed at large scale as the lines are created mathematically rather than set-size pixels.
Image resolution is undoubtedly the most important point on our list of Illustrator practices for exhibition graphics. By using high-resolution imagery and vector logos and text, you can be certain of beautiful stand graphics ✨

Left: vector line-work logo. Right: Rasterised logo. Vector graphics always provide higher quality prints.
Scaling
We may provide your artwork templates in a scaled down size, often 50%, sometimes 25%. This is because Illustrator has limits on the maximum artboard and bleed dimensions, which aren’t high enough for large format printing.
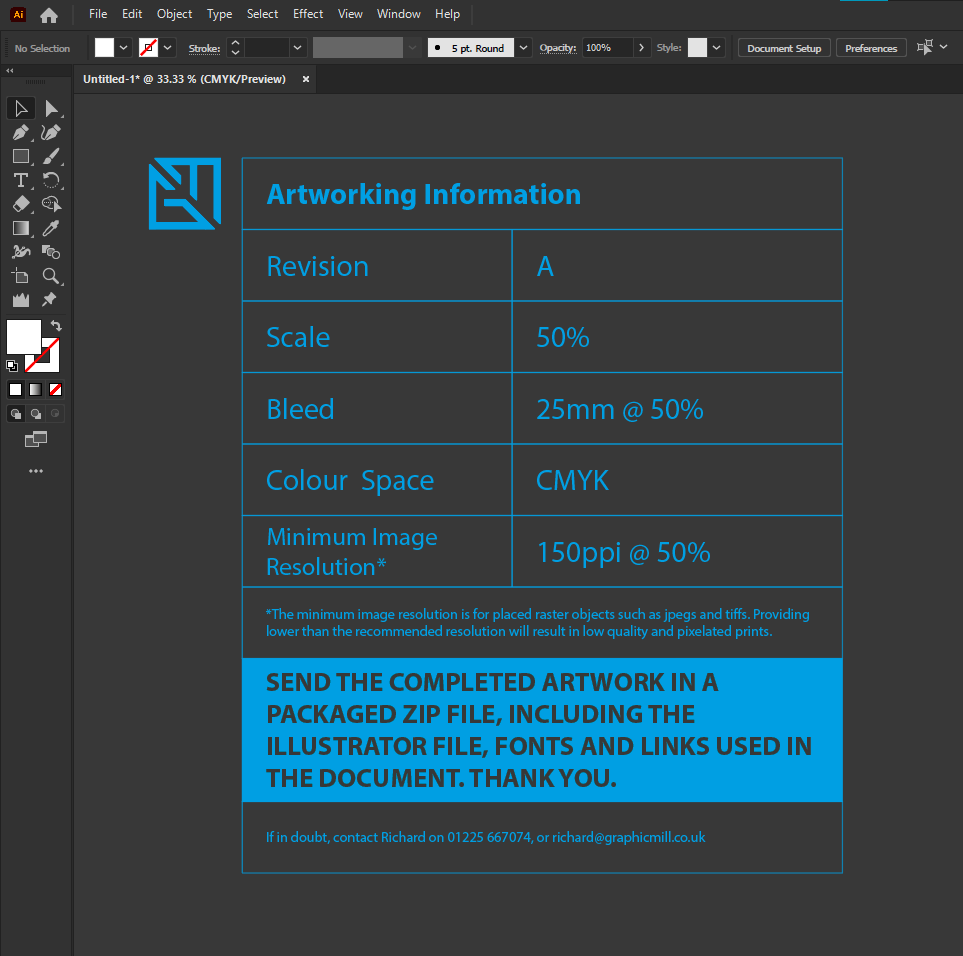
Follow the info panel in our artwork templates.
In the templates, there is a clear info panel detailing the scale of the document and the minimum PPI of imagery at this scale. The artboards are also set up with a “_50%” or “_25%” suffix which is another flag for the scale of the document.
Overprint Fill
Overprint Fill, a lesser known feature in Illustrator, is a way to prevent colour knockout in a piece of artwork. When an object is checked for overprint, it becomes opaque to any colours below – almost like a wash of water colour. This might sound neat but in reality it is a major headache to printers and we recommend avoiding it whenever possible.
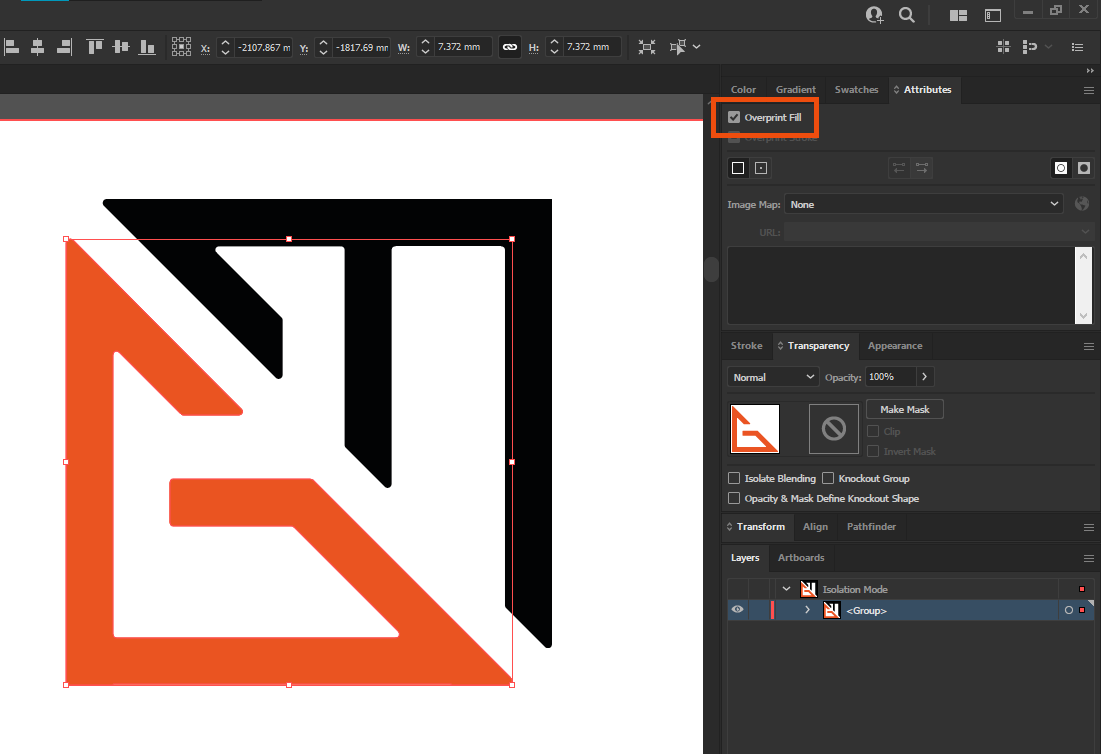
The Overprint Fill checkbox. Beware, once checked, it stays on until you uncheck it!
Due to the way Illustrator works, there isn’t an easy way to check for objects that have been marked for overprint. Even worse, it’s far too easy to leave the feature checked on, meaning all newly created objects are marked in overprint. This leads to disappearing text and objects, and ultimately incorrect print.
Transparency effects such as “Multiply” do the same job without the aggro.
Sending Artwork
You’ve finished your artwork and it’s been signed off – happy days! 😄
The next thing is to get it over to us so we can check it over. The best way to send your artwork is to package the Illustrator file. This compiles all the used “links” including the image files, fonts and editable artwork file into one folder. Often, clients will send through editable and outlined versions of their artwork, with all the text and stroke objects converted to outlines in the latter. Providing artwork in this way allows our pre-flight team to make any tweaks for the printing process.
Once the folder is zipped, you can send it through your preferred file sharing service, Dropbox, WeTransfer, etc. We’ll then do our pre-flight checks and prepare the artwork for production, providing you with a fully branded 3D proof for your final sign-off.