A great layout can really make all the difference in how effective your exhibition stand design will be. Whether you have a large plot or small stand space, the layout and visitor flow are key to making the stand work. This article will outline how we design exhibition stand layouts.
Designing the stand layout is the very first part of the stand design process, we work offline on this stage before looking at branding or opening any 3D modelling software.
The objective of this stage of the design process is to decide where the most important parts of the stand need to be on the floorplan, and how visitors will interact with these areas.
Decide the best orientation for the stand
Plan the main stand zones
Design the exhibition stand floorplan
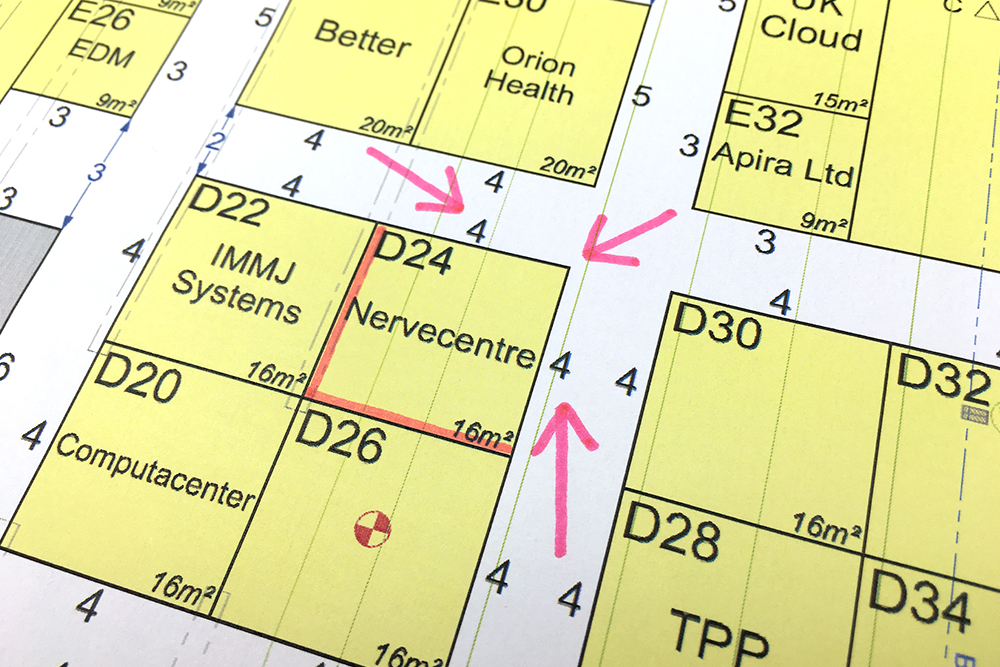
Decide the best stand orientation
The first job is to decide the best way the stand should be pointing. Use the exhibition floorplan to figure out how visitors will approach the stand from the main aisles. Where are the show entrances, high traffic areas and catering zones? Look out for where the main competition will be too!
Draw arrows onto the floorplan to show the key viewing angles that need to be designed for.
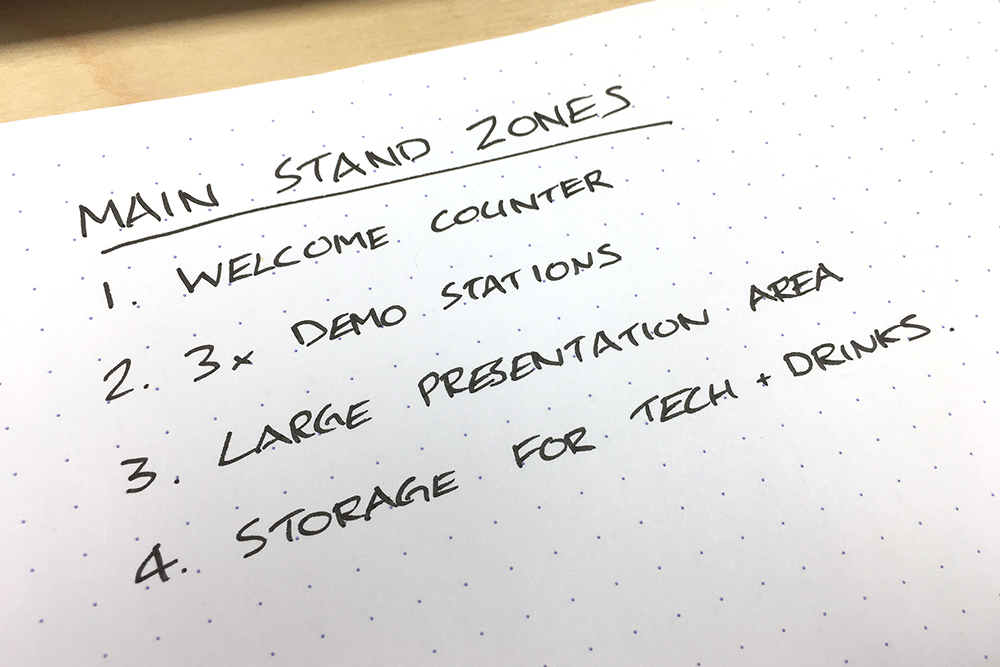
Plan the main stand zones
Start by making a list of all the areas you’ll need on the exhibition stand. Here are a few ideas:
- Meeting areas –High-level chairs use the least space, low seating is perfect for more informal meetings. Or would standing only work?
- Product displays – How will you present your product or service? Will there be presentations or sampling?
- Storage – will there be stock, giveaways, coats/bags to store for the team? Sometimes under counter storage is enough, but if there’s space on the plot a walk-in store built into one of the back walls is best.
Tip – don’t forget to leave space for the mains power box and any AV controllers - Interactive zones – will there be any AV demo stations, interactive games or competitions on the stand?
- Meet and greet – a reception counter create a clear point for visitors to approach the stand. These can also incorporate storage and are great for bringing the branding to the front of the stand.
Now we have the list of the main stand zones, we need to order it in order of importance, from most to least. We can use this list to determine how much space should be allocated to each zone.
Design the exhibition stand floorplan
Now’s the fun part – we can start working on the floorplan design of the exhibition stand.
How will visitors interact with the stand?
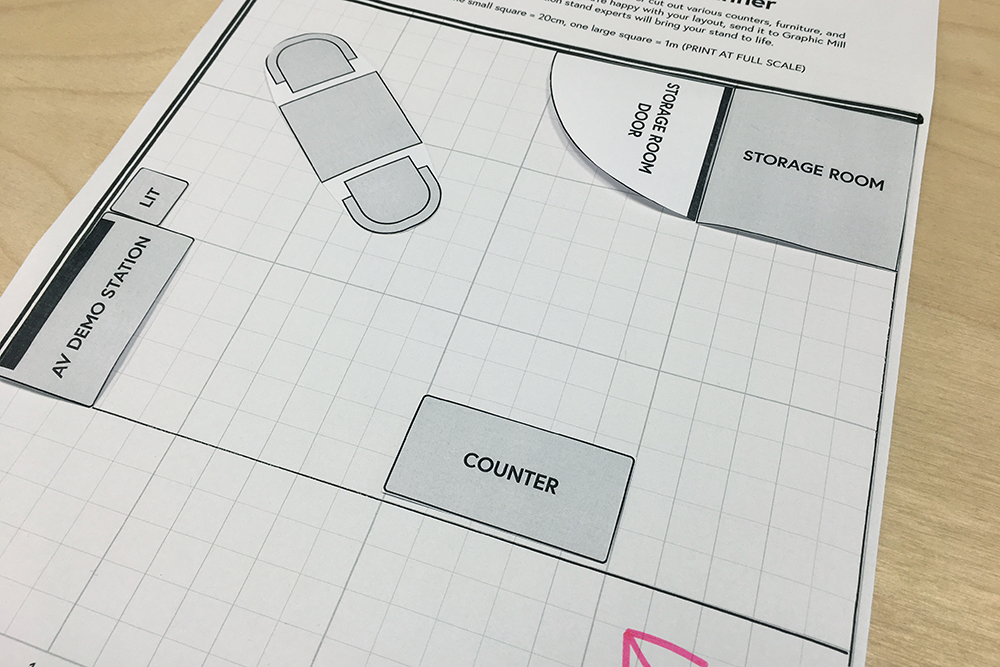
For this, it’s best to keep things simple! Before going to any computer design software – we start with simple paper cutouts and sketches of the key stand components and play with layouts. It’s really important to work to scale when working out how visitors will flow through the stand.
We’ve created a handy free ‘Exhibition Stand Floorplanner’ PDF, with scaled grid floorplan and basic CAD Blocks (Cardboard aided design) for common stand components. You can download it here– no need to enter your email!

Start by printing off the blank floorplan and draw on the dividing walls for the stand.
Now we can cut out the furniture blocks and lay them out on the stand floorplan. We’ll draw on any dividing walls and sketch in the walkways.
Top Tip: It’s important to leave enough room for people to pass by safely. We recommend leaving at least 1.5m – 2m space between each wall/furniture. In post COVID times, it would be a good idea to leave a little more space too.
Next Steps
You can now scan the floorplan to present to your team and share with your exhibition contractor!
Once you’re happy with the draft floorplan layout, it’s time to build the walls and create the stand in 3D.
If you’re looking for help with your stand design – we offer completely free exhibition stand design and quoting. Please email Dan Speich, head of projects and planning at [email protected] or call +44 (0)800 464 7974 to get started.